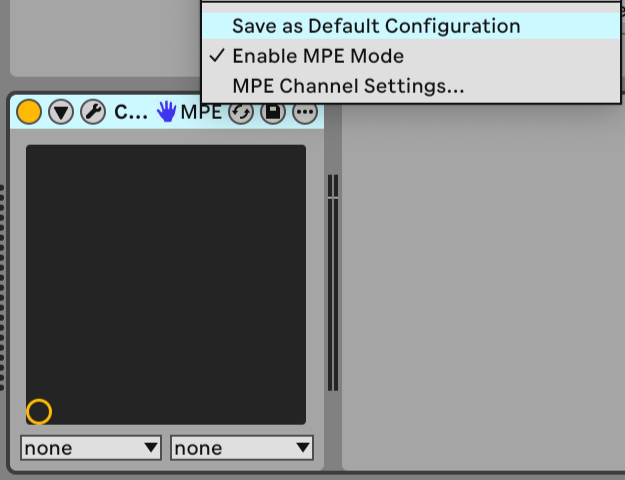
configuring the MIDI ports
🎞️ Find a video regarding Osmose CE DAW Control for Ableton Live here.
Starting with version 12.4, Ableton Live already includes the necessary scripts for DAW Control. Please download the latest version of Live and update it before continuing. Once completed, we recommend checking the settings below to ensure smooth operation:
In Ableton Live’s Settings -> MIDI Control Surfaces, it should look as follows.
In macOS, Port 3 is labeled ‘Osmose CE daw control’
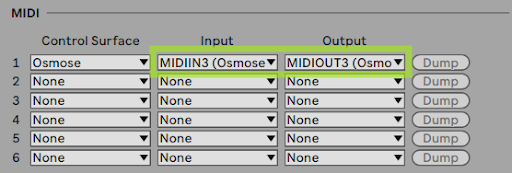
Under inputs, for USB MIDI Port 1 of Osmose CE, be sure to activate Track and MPE.
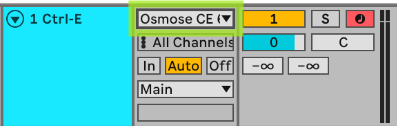
In macOS, Port 1 is labeled ‘play‘.

ℹ If ‘takeover mode’ in Ableton is configured to ‘none’, go to Settings > Controllers and choose ‘pickup’.
If Osmose CE doesn’t offer DAW Control mode despite it being connected to your computer that is running Ableton Live 12.4+, please check our 🔗DAW script troubleshooting Ableton Live.
For your track’s MIDI input, select the Osmose CE port 1 (play port) listed below:
enable mpe for ctrl-e
To make sure Ctrl-e works correctly in Ableton Live, the plugin should be recognized as an MPE-enabled device. This should normally be enabled automatically. If you experience any issue with MPE playback or expression, you can check it manually:
Right-click the Ctrl-e device title bar in Ableton Live, where the plugin name appears and make sure Enable MPE Mode is checked:
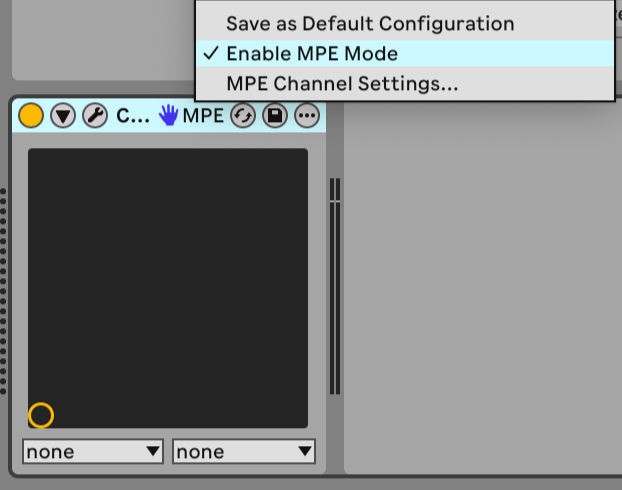
Then select Save as Default Configuration so Ableton Live remembers this setting for future Ctrl-e instances.