


opening the transport panel
The Transport Panel gives quick access to DAW transport and navigation controls.
In DAW Control mode, press the MODE button (1) to open the Transport Panel as an overlay on top of the current menu. Press the button again to return to where you came from.
💡 You can also hold the MODE button to access the Transport Panel temporarily. Releasing the button lets you return to wherever you came from. This is useful for quick actions like hitting Record or Stop.
transport panel overview
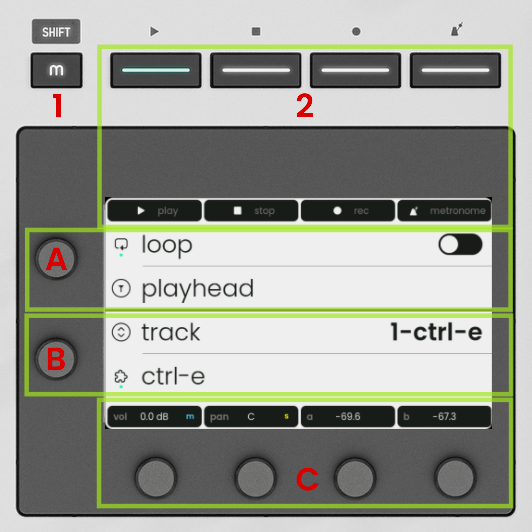
The Transport Panel is organized into four main groups of functions, giving you quick access to the most useful DAW controls directly from Osmose CE.
transport controls (through the MODE buttons (2))
Control the main transport functions of your DAW: Play, Stop, Record, and Metronome.
playhead and loop management (through Knob A (A))
Navigate through your project timeline and manage loop-related functions, such as enabling the loop, adjusting its position, or changing its length.
track, scene, and clip navigation (through Knob B (B))
Navigate through tracks, scenes, and clips directly from Osmose CE. The available navigation options depend on the DAW you are using, as not all DAWs support scenes or clips.
mix controls (through VALUE encoders (C))
Control the mix settings of the currently selected track, including Volume, Pan, Mute, Solo, and Send 1 / Send 2 when available.
transport controls
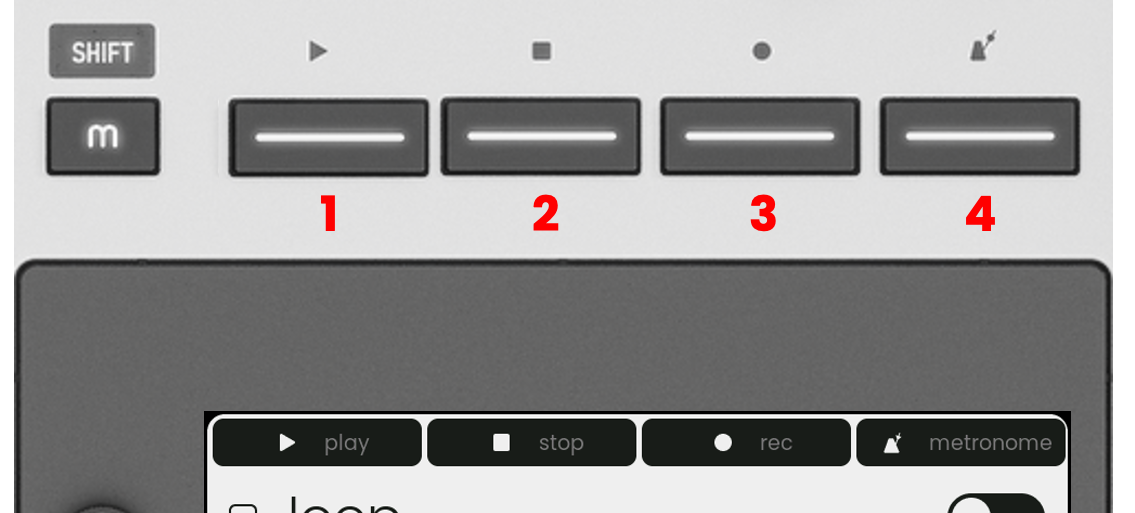
When the transport panel is open, the four menu buttons above the display control the main transport functions of your DAW.
Press menu button 1 to start or pause playback.
Press menu button 2 to stop playback.
Press menu button 3 to start or stop recording.
Press menu button 4 to turn the metronome/click on or off.
The current transport status is shown both on the screen and through the button LEDs.
playhead and loop management
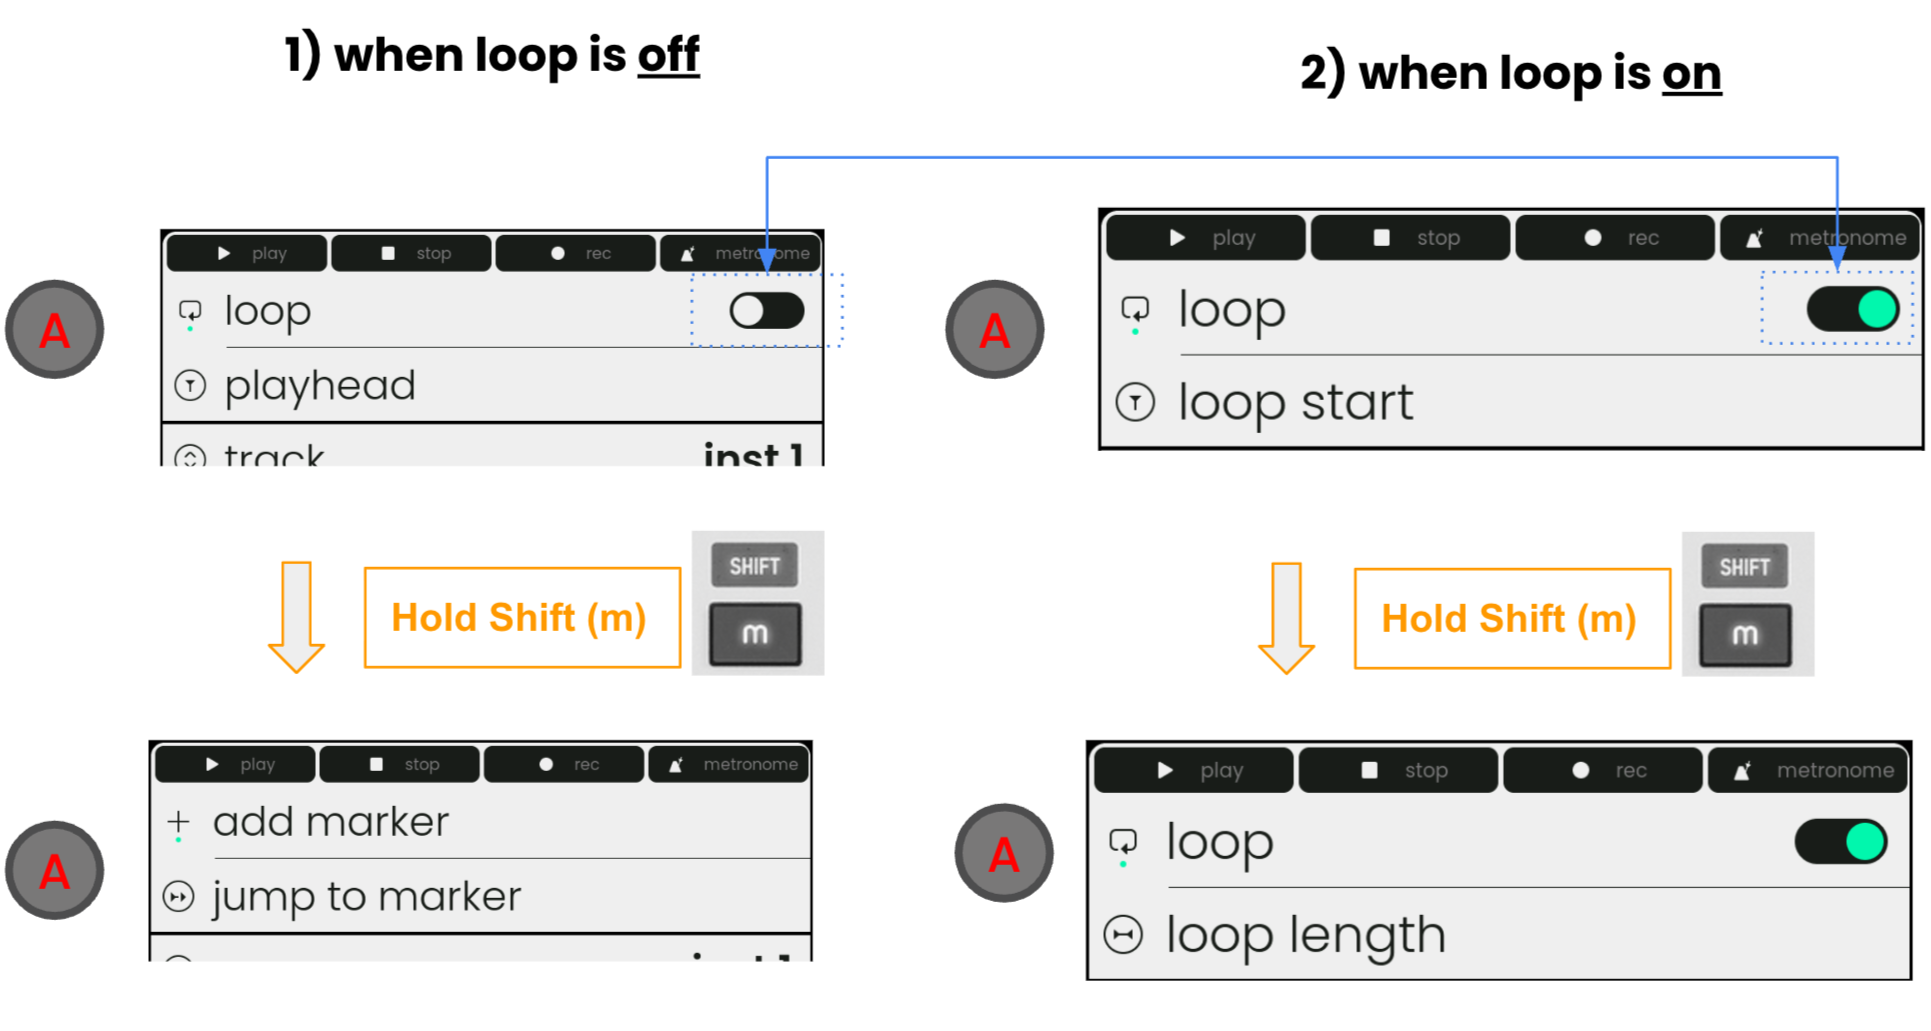
When the Transport Panel is open, Knob A gives access to playhead, loop, and marker-related controls.
|
|
|
track, scene, and clip navigation
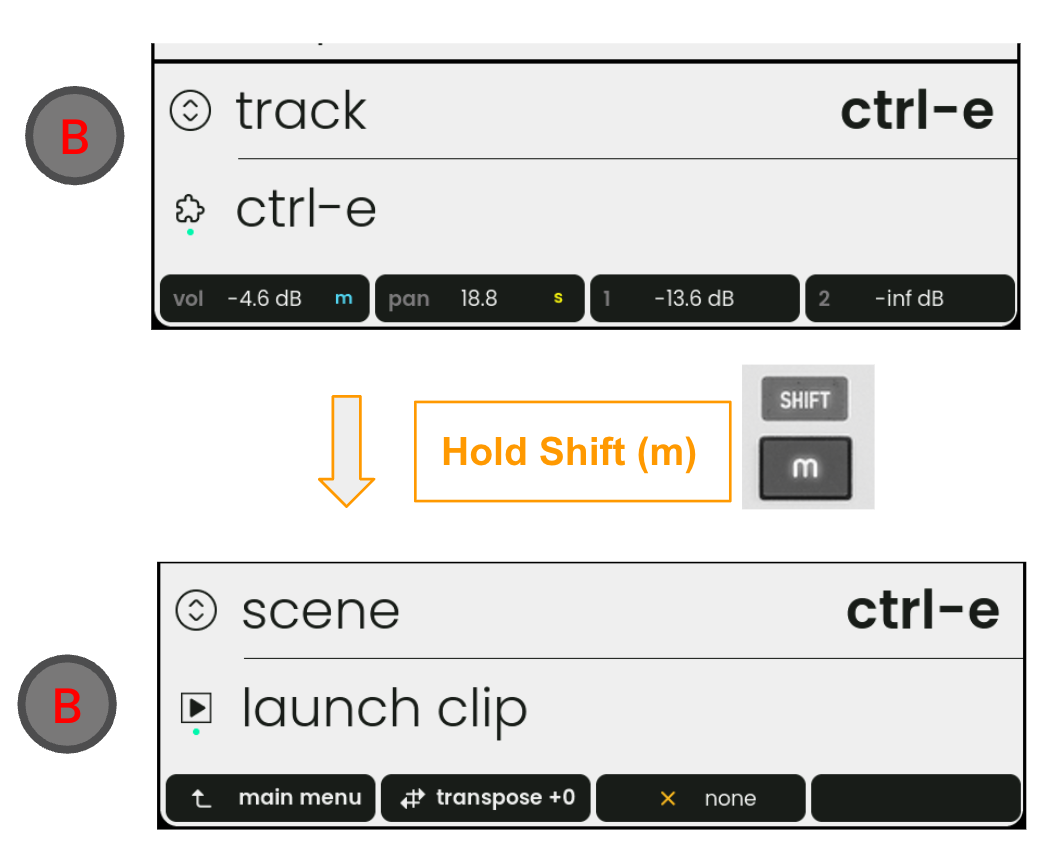
When the transport panel is open, Knob B gives access to track, scene, and clip navigation.
Turn Knob B to navigate between tracks.
Press Knob B to open or close the plugin window on the selected track.
This function is not currently available in Ableton Live.
Hold SHIFT (m) to access additional scene and clip controls (only available for Ableton Live and Bitwig Studio): turn Knob B to navigate between scenes, or press Knob B to launch the clip on the selected track
mixer controls
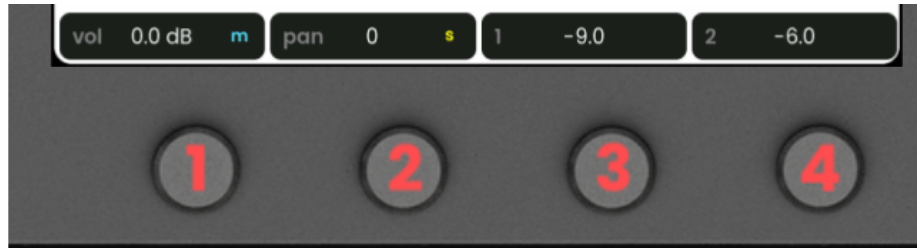
When the transport panel is open, VALUE encoders 1–4 give access to the mix controls of the currently selected track.
Turn encoder 1 to adjust the track volume.
Press encoder 1 to mute or unmute the track.
Turn encoder 2 to adjust the track pan.
Press encoder 2 to activate or deactivate solo for the track.
Turn encoder 3 to adjust send 1.
Turn encoder 4 to adjust send 2.
☝️ The send 1 and send 2 controls depend on the routing and send configuration of your DAW project. If the corresponding sends, buses, auxes, or FX channels are not available, these controls may be disabled.
bottom action bar
Holding SHIFT (m), wherever you are in the navigation — on the transport panel or on one of the four main menus — reveals the bottom action bar.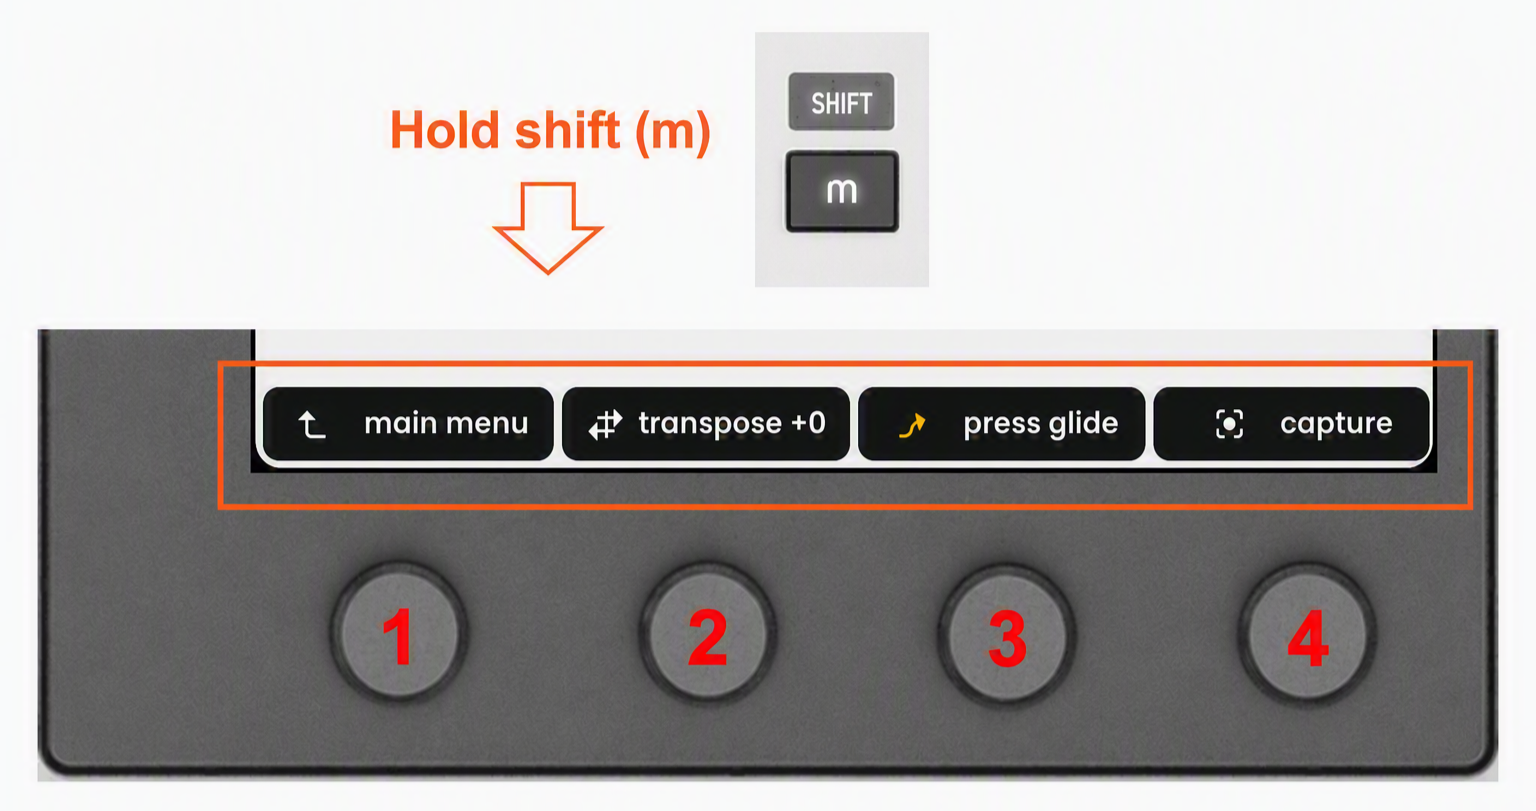
The bottom action bar gives quick access to global or context-related shortcuts:
1 - main menu - Press encoder 1 to return to the main menu.
2 - transpose - Turn encoder 2 to transpose the keyboard in semitone steps. Press to reset to 0.
3 - toggle playing feature - Press encoder 3 to enable or disable the selected playing feature, either pressure glide or the expressive arpeggiator
4 - capture / switch device - Press encoder 4 to trigger your DAW’s MIDI Capture function, when available. MIDI Capture retrieves the notes you have just played, even if you were not recording. ☝️The capture function is available in Ableton Live, Cubase, and Logic Pro. It is not available in Bitwig Studio.
When in macros tab, the shortcut “switch device” will be shown instead of “capture”, see section macros and device switching.
macros and device switching
controlling your track macros
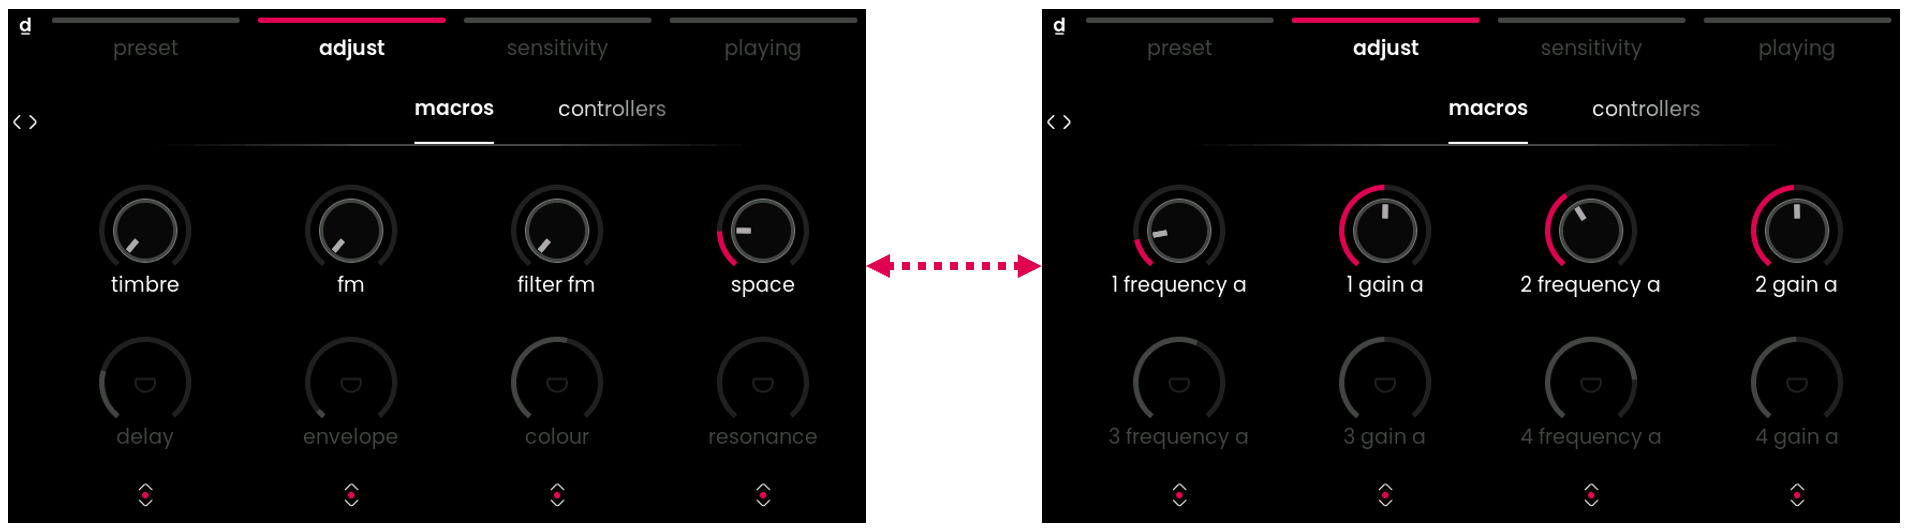
When DAW Control mode is active, press the second menu button to open the adjust menu. The first tab is the macros tab which displays eight macros connected to the macros of the device/track you are currently on.
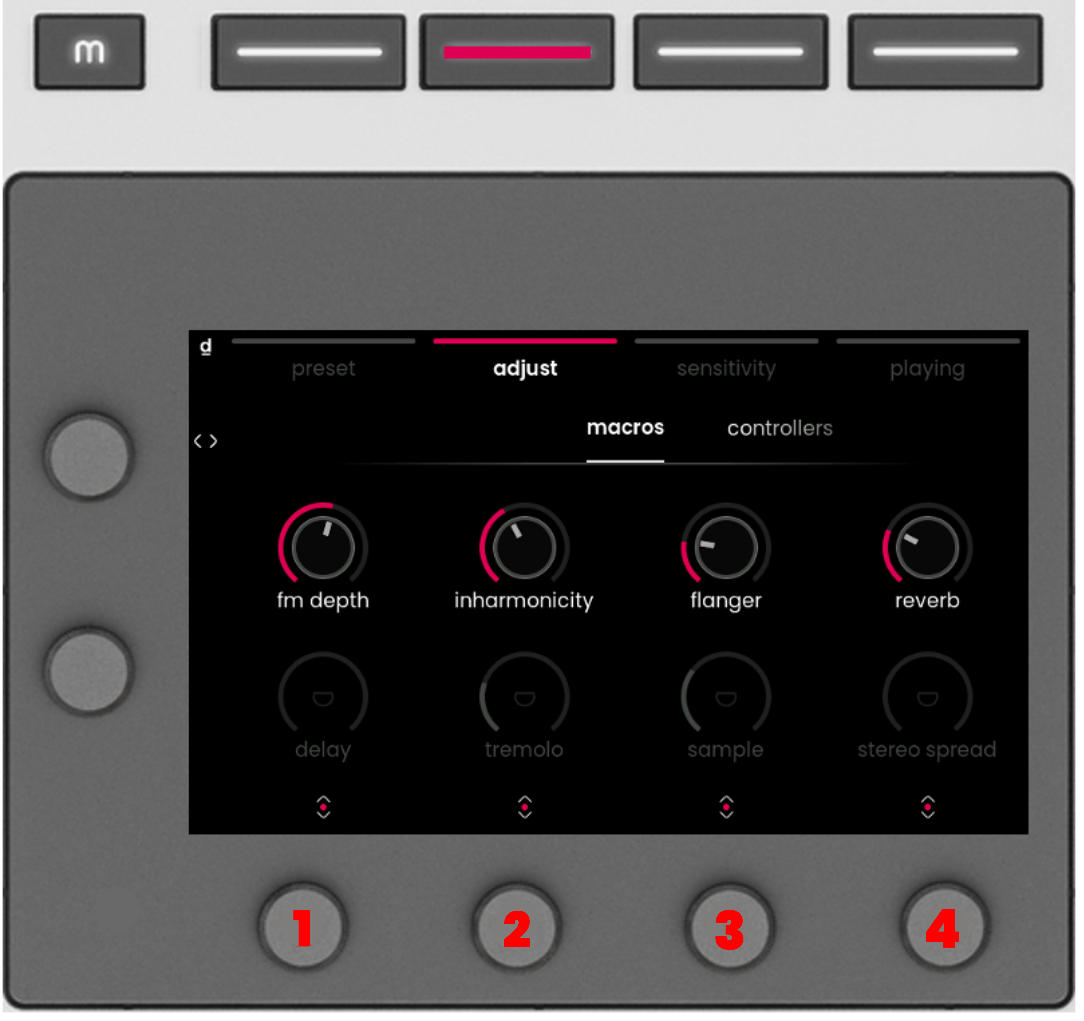
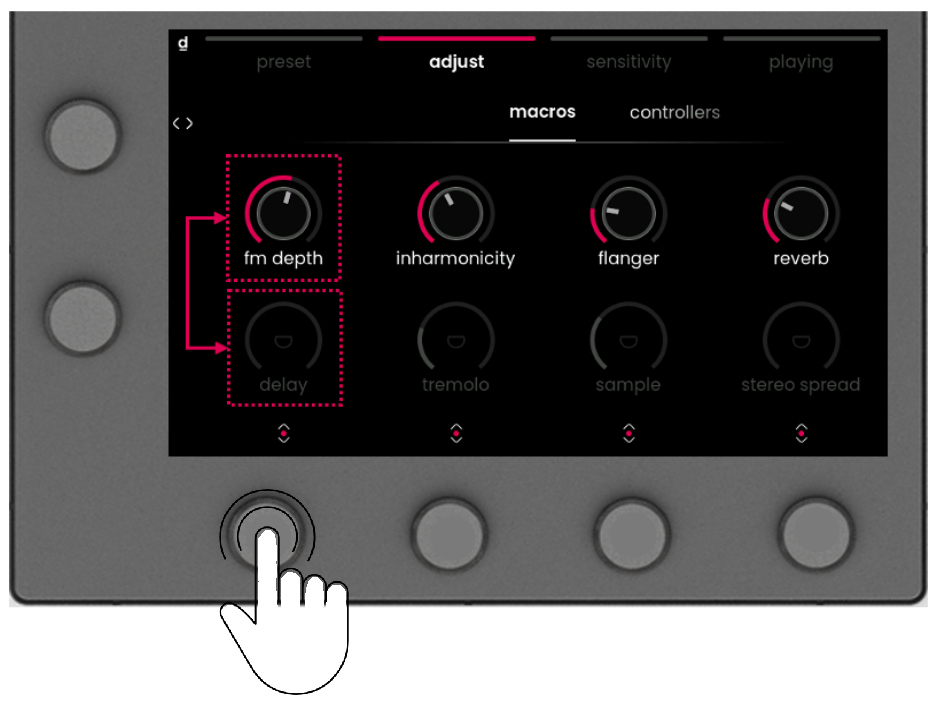
In order to control 8 parameters from 4 knobs, each encoder controls one column. Pressing a knob toggles between controlling the upper and lower parameter in that column:
switching between track devices
In Ableton Live and Bitwig Studio, you can also scroll through the devices on the selected track directly from the macros tab, and the macro selection will follow along. Hold SHIFT (m) to reveal the bottom action bar, then turn the encoder 4 below switch device to navigate between the devices on the current track.

For example, if your track contains both a synth plugin and an EQ device, you can use “switch device” to choose whether the eight macro controls adjust the synth or the EQ:
additional functions
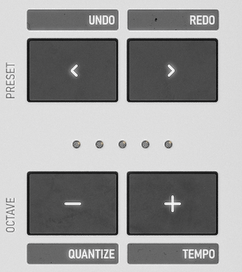
Some DAW Control functions are accessed through secondary shortcuts on the main panel. Hold SHIFT (m), wherever you are in the navigation, then use the preset and octave buttons to access the following functions:
undo - Hold SHIFT (m) and press the left preset button (<) to undo the last action.
redo - Hold SHIFT (m) and press the right preset button (>) to redo the last action.
quantize - Hold SHIFT (m) and press the left octave button (-) to quantize the current selection according to your DAW settings.
tempo - Hold SHIFT (m) and press the right octave button (+) to open the tempo screen.
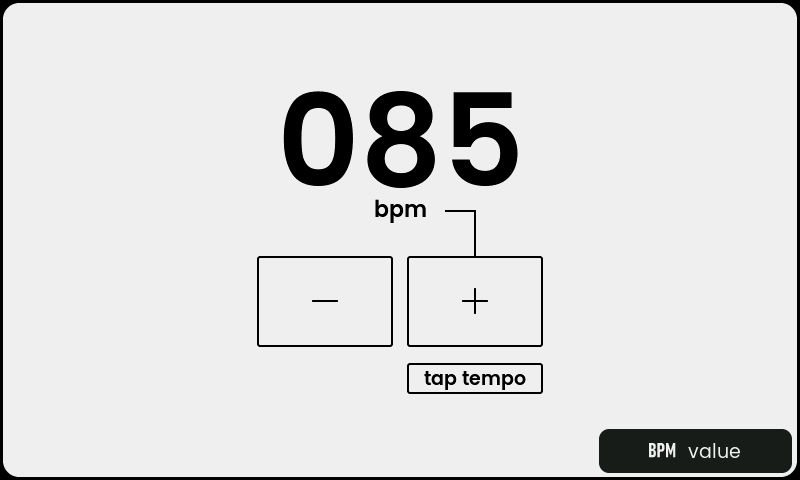
On the tempo screen, turn encoder 4 to adjust the tempo, or repeatedly press the right octave button (+) to tap the tempo. Press shift (m) or one of the menu buttons to exit the screen.

