
 3653
3653
The Sensitivity Menu allows the user to change the response of the Augmented Keyboard Action. Four tabs are available:
bending tab : changes the response of the lateral movement on each key, incl. the pitch bend range and the amount of stabilization.
pressure tab : changes the response of the first part of the key travel. ‘note on’ determines the vertical threshold position at which a key actually triggers a note.
aftertouch tab : changes the response of the second part of the key travel.
default sensitivity tab : saves your current settings as the default sensitivity that will then be used across all factory sounds.
💡 The “save sensitivity” option of the save tab in the presets menu allows you to save a sensitivity along with a specific user preset.
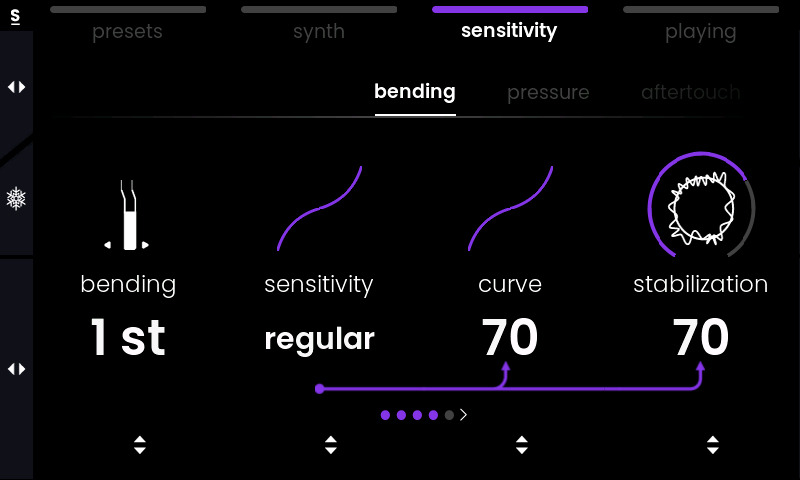
bending tab

The ‘bending’ tab lets you change how the lateral bending of a key will affect the pitch. it contains the following parameters:
bending is the range that defines how far the pitch will be modulated at maximum deflection. Given the limited sideways key travel, you’ll probably want to go with 1 or 2 semitones most of the time, but wider ranges can also produce interesting results.
sensitivity allows you to quickly choose between a set of predefined responses that affect how Osmose reacts to vibrato or bend gestures in a natural way, while at the same time helping you to stay in tune when no bending is intended. It steps through useful settings for both curve and stabilization at once. There are five sensitivity sub-presets that go from low, medium, regular, to sensitive, and high.
💡bending range and sensitivity work great if you use them as counterparts: If you set a range of 2st for making bends while playing chords, medium sensitivity could be a good setup, however, if you only want to play vibrato and have subtle pitch variations selecting ¼ or ½ st with high sensitivity will yield best results.
curve will establish a dead zone around the middle of a key in order to avoid unwanted bends. However, playing vibrato with only subtle gestures will become increasingly difficult the bigger the dead zone is.
stabilization is an algorithm that will intelligently smooth out uneven motions that tend to happen especially during the first few moments of your keystroke.
💡to visualize the difference between curve and stabilization, look at both curves while playing with a note. The point on sensitivity shows the result of both ‘curve’ and ‘stabilization’ parameters, while the point on curve shows the raw sensor data of this parameter.
activation allows you to enable bending only for specific notes. For instance, it might come in handy to only activate bending for the highest note when playing chords with the left hand and soloing with the right.
pressure tab
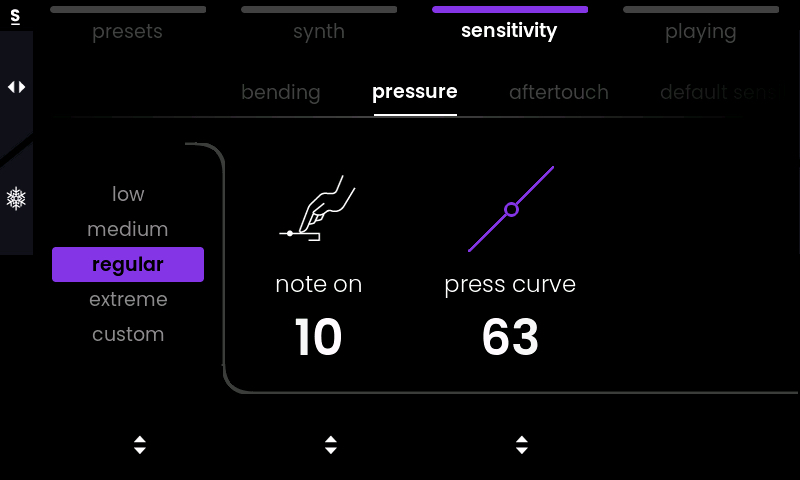
The ‘pressure’ tab concerns the first vertical dimension of the keys. The first parameter of the pressure tab offers sub-presets that adjust the following two parameters at once:
note on lets you define at which point of the downward key travel an actual note is triggered, which is called the ‘note on’ threshold.
press curve adjusts the response of the pressure dimension with a curve.
If you change those two parameters individually, the sub preset will switch to ‘custom’.
💡If you find yourself triggering notes unintentionally, then you may want to shift the ‘note on’ threshold more downwards the key travel by increasing its value. This will bring you more and more towards a classic keybed feel where notes are only triggered when you push a key right down to the bottom.
On the other hand, if you’re eager to experiment with triggering notes using only light taps on a key’s surface, then an ‘extreme’ setting for the pressure dimension will allow you to do exactly that.
aftertouch tab

The aftertouch begins where the pressure axis motion is at the maximum. Aftertouch is the second part of the vertical key travel, following a clearly detectable pressure point.
The first parameter of this tab suggests quick presets for the aftertouch sensitivity curve, which can also be finely adjusted by turning Value Encoder 2.
💡The more notes you play at once, the harder it will become to push fully into the keys’ aftertouch without bending the notes’ pitch unintentionally. This would be an example of a situation where you might prefer to have a sensitive aftertouch that doesn’t require lots of force to activate. On the other hand, if a preset triggers a special sound aspect upon entering the aftertouch, e.g. automatic ratcheting of a plucked sound, and you wish to have a clearer separation, it will help to dial down the aftertouch curve.
default sensitivity tab
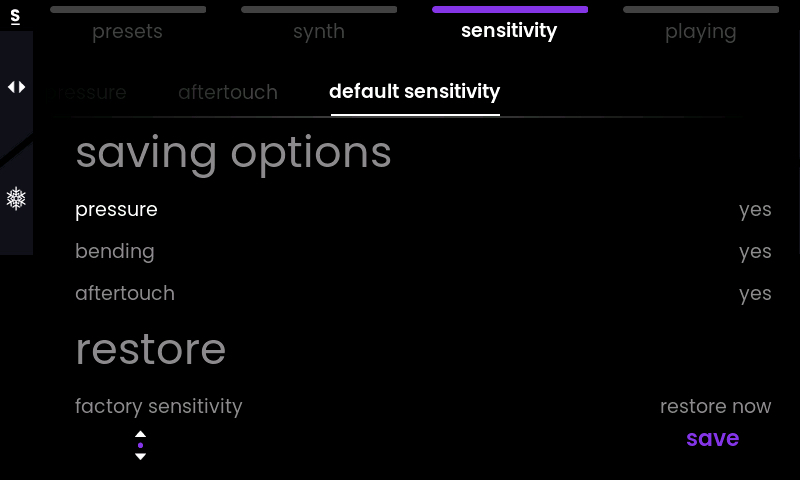
The last tab of the sensitivity menu allows you to save your current settings as the default sensitivity that will then be used across all factory sounds. Factory sounds don’t have a specific sensitivity saved with them, so upon preset change, you will always fall back to the default setting saved at that time.
Defining your default sensitivity will help you feel at home with the instrument. While you’re growing your level of comfort with Osmose, you may want to update that setting from time to time.
freeze sensitivity function
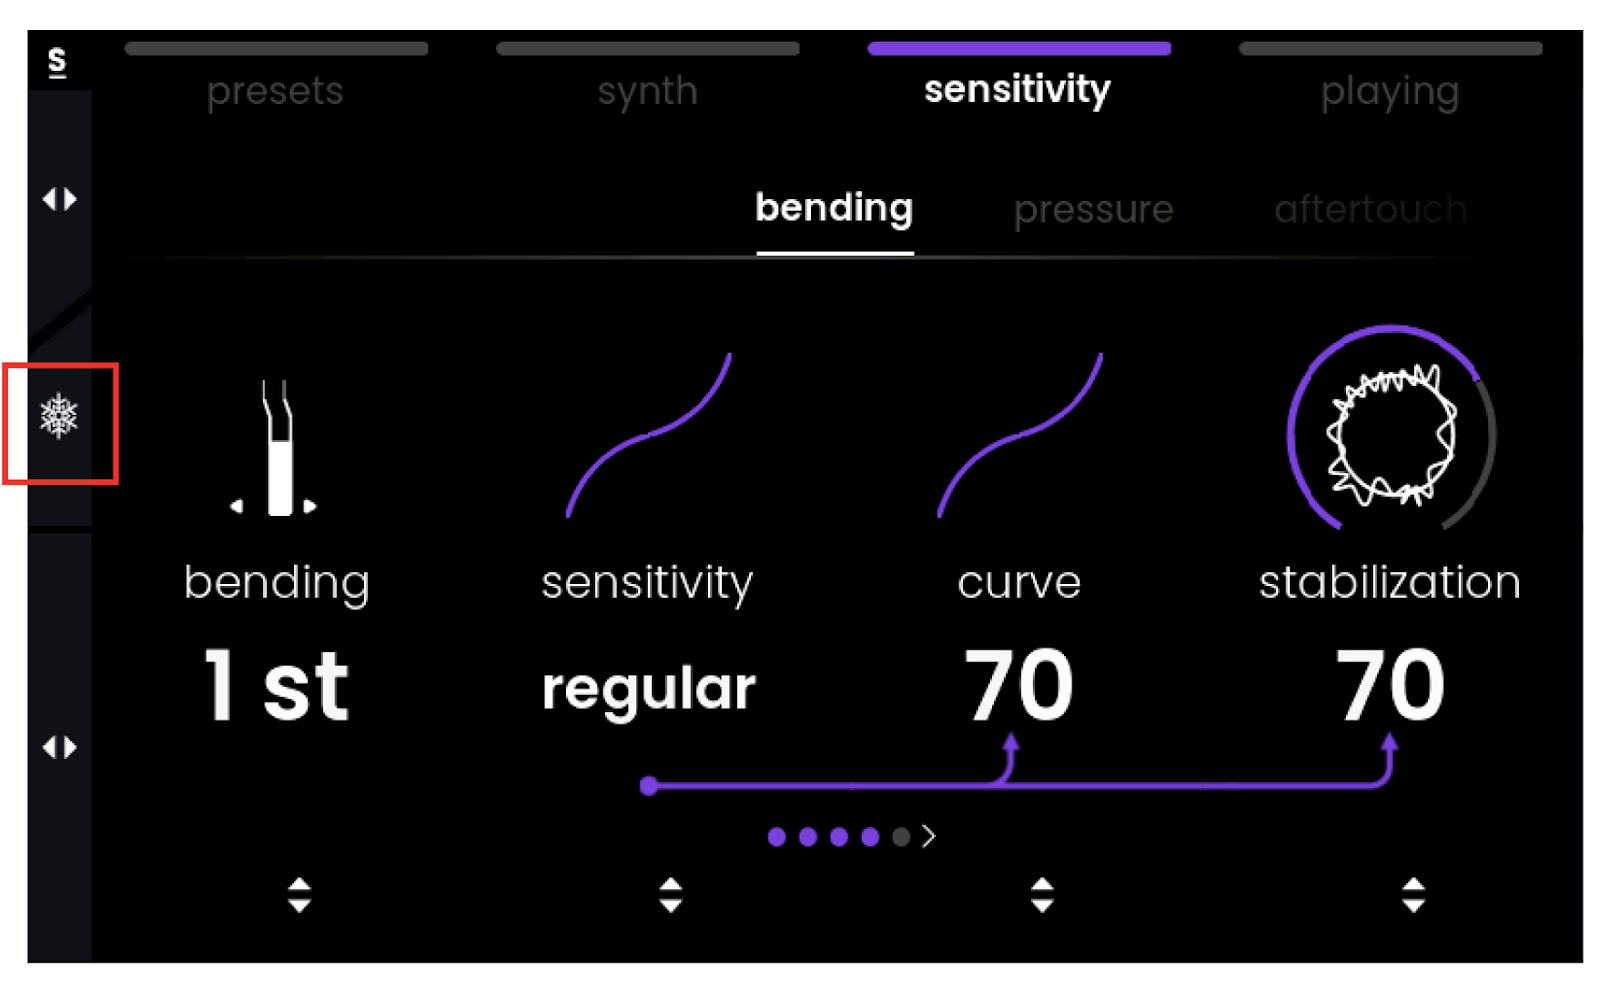
Pressing the Tab Selector in Sensitivity menu switches the Sensitivity Freeze❄️on and off. When Freeze is enabled, the current sensitivity settings will be kept across preset changes, no matter the default sensitivity and no matter whether there is a custom sensitivity saved in a user preset.
’Sensitivity Freeze’ lets you test a specific sensitivity setting without having to overwrite your ‘default sensitivity’. It also allows for testing a sensitivity setting while scrolling through user presets that have custom sensitivity settings saved with them (compare the ‘save sensitivity’ option in the save tab of the preset menu).
Frozen sensitivity values are lost when turning off Osmose. If you want to keep a sensitivity setting, use the default sensitivity tab.

