


This article explains how to set up Osmose with firmware 2.3+ within Ableton Live 12.4 and higher. There's also a video tutorial available here: 🎞️use osmose with ableton live - creative tutorial, but be aware that it was done with an older firmware version that didn't have DAW Control or Ctrl-e support, and only 2 USB MIDI ports.
Configuring the DAW's MIDI settings
First, select and configure the Osmose USB MIDI ports. Open Ableton Live's Settings -> Tempo & MIDI -> MIDI.
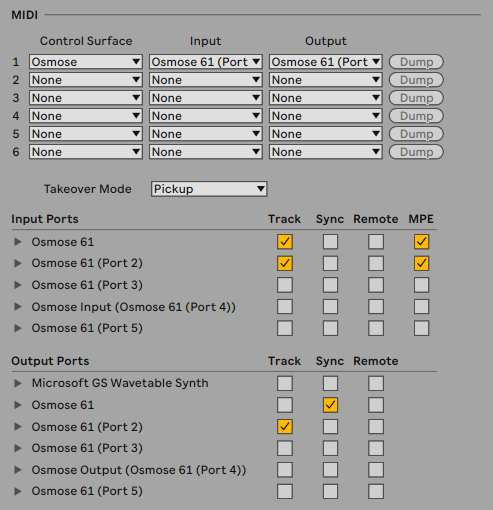
This is how it should look under Windows:
And these are the more explicit names in macOS:
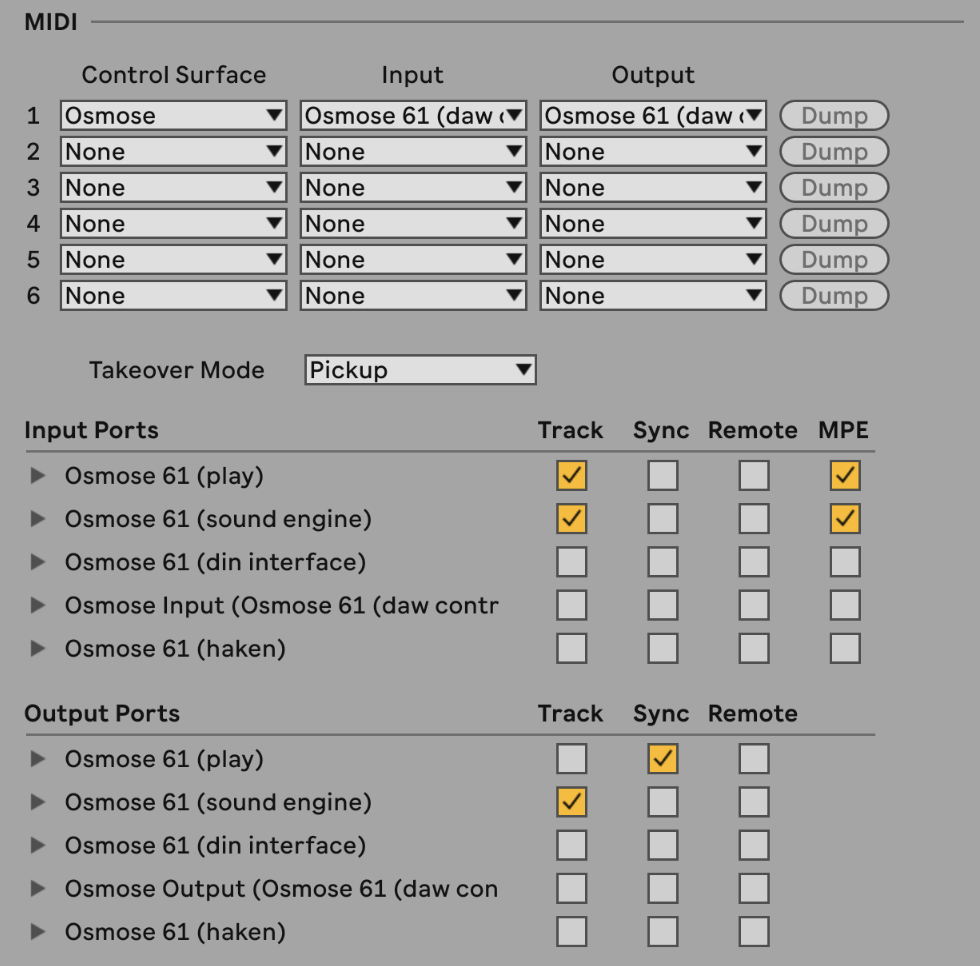
Port 4 (daw control) should be detected and selected automatically for the Control Surface Input & Output. It will enable using Osmose's DAW Control mode.
For Port 1 (play), activate Track & MPE for input to play plugins, and activate Sync for output to be able to sync Osmose's arpeggiator to the DAW project's tempo.
Optional: If you wish to integrate Osmose's internal sound engine as an external hardware instrument in your DAW: For Port 2 (sound engine), activate Track & MPE for input, and Track for output.
Using Osmose as an MPE controller in Ableton Live
When controlling external instruments inside your DAW, use USB MIDI Port 1 (play) of Osmose exclusively. On your Windows PC, Port 1 will simply be called "Osmose 49" or "Osmose 61". Take this into account for all the following instructions:
Choose a compatible configuration for Osmose's External MIDI Mode
Enter the config menu of External MIDI mode and select the configuration preset that the plugin you wish to control supports.
For this tutorial, we assume the plugin you want to control supports MIDI Polyphonic Expression, so you can take advantage of all the per-note expression that Osmose's keybed offers.
Select the config preset "mpe". This will make Osmose send MIDI messages according to the MPE specification on Port 1 (play).
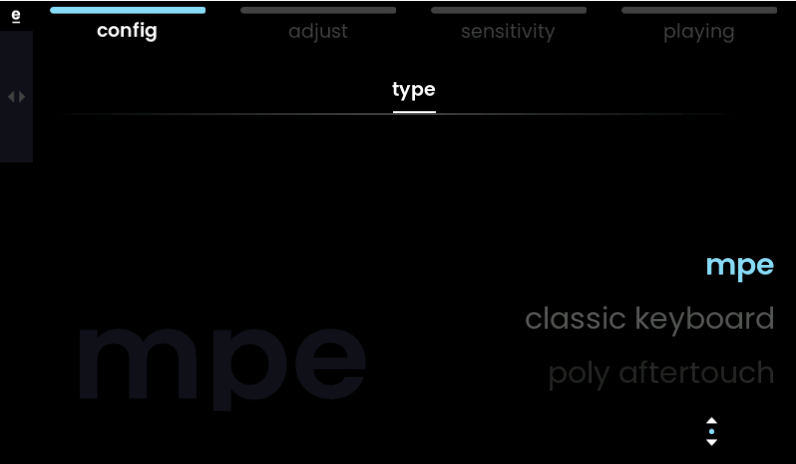
When you have selected a track with Ctrl-e loaded in it, Osmose will automatically send MPE data by default; see DAW Control on a Ctrl-e track.
Creating an instrument track with Osmose as the input device
In Live, create a new MIDI track: “Create” > “Insert MIDI Track”. In the "MIDI from" of this track, select Port 1 (play) of Osmose:
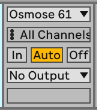
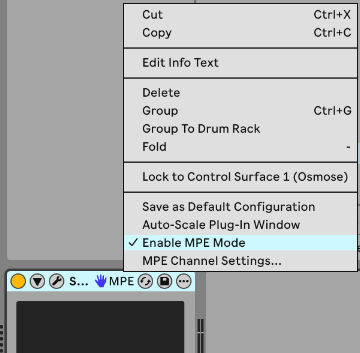
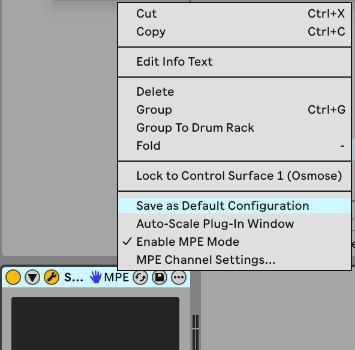
After adding your MPE-compatible plugin instrument to the track, right-click on its title and ensure that ‘Enable MPE Mode’ is checked. Click 'Save as Default Configuration' to ensure MPE is enabled by default whenever you add this plugin to a track in the future.
Configure MPE interpretation in the plugin
Note that for some MPE-compatible plugins, you must also enable MPE functionality within the plugin. Check your plugin’s manual to learn about its MPE workflow. When MPE is activated in the plugin, 'Pressure' will be controlled by Osmose's Initial Pressure axis and 'CC74 (MPE Timbre/Slide)' is controlled by Osmose's Aftertouch axis. For more details, see config menu.
Ideally, in MPE synths, the maximum MPE note pitch bend range (Axe X) should be set to +-48 semitones, which is the defacto MPE standard. This setting is required for the Pressure Glide feature in playing menu of Omose to work correctly. It's also required to make the ‘bending range’ in Osmose (Ext Midi mode > sensitivity menu > bending tab) show the correct per-note bending range in semitones.
Integrating Osmose as an external instrument in Ableton Live
To record performances on your Osmose as MIDI messages inside your DAW and play them back into Osmose, use USB MIDI Port 2 (sound engine) exclusively.
Select the suiting midi i/o settings on Osmose for integration into a DAW setup
Head to Osmose's midi i/o tab. Set 'haken local control' to "off" to cut the direct connection between Osmose's keybed and its sound engine.

We will reestablish that connection by routing your playing through your DAW first, before it enters the internal sound engine.
Attention: With 'haken local control' set to "off", your playing on Osmose will only sound when its track in your DAW is armed.
Creating a MIDI track with Osmose as input and output device
In Ableton Live, create a new MIDI track: “Create” menu > “Insert MIDI Track”. In the "MIDI from" section of this track, select "Osmose (Port 2)".
Add the "External Instrument" device from Ableton Live's Instruments Library. Choose "Osmose Port 2" for MIDI To and "MPE" as the channel setting. For Audio From, select the stereo input of your audio interface that your Osmose is connected to.

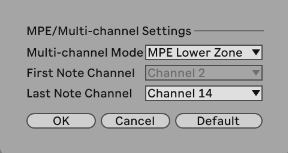
Click in the MPE box you have just chosen and select "MPE Settings":

In MPE Mode, Ableton Live doesn't necessarily playback MIDI notes on the same channel they have been received on. This is intentional because otherwise, overdubbing MPE performances wouldn't work reliably. Instead, Ableton Live redistributes notes across all MPE Member Channels on the fly upon playback. Since the EaganMatrix in Osmose doesn't accept notes on all 15 default MPE member channels (2 to 16), we need to limit the channels used by Ableton Live when outputting MIDI to Osmose. In the MPE setting window, set "Channel 14" as the "Last Note Channel".
Arm the MIDI track, and you are ready to record, edit, and play back Osmose performances in Ableton Live.

