273
273
This guide explains how to properly reseat Osmose keys if they were dislocated by heavy vibrations or impacts. This guide is useful for cases where black keys are concerned or/and white keys got detached completely. If only white keys are concerned, and they still seem connected with their springs at the hinge at the rear end of the keys, you should first try the quick fix indicated here: Some keys on my Osmose are protruding and raised far above other keys
Before proceeding to the steps below, you will first need to remove the top plate of Osmose or Osmose CE:
How to remove the top plate of Osmose
How to remove the top plate of Osmose CE
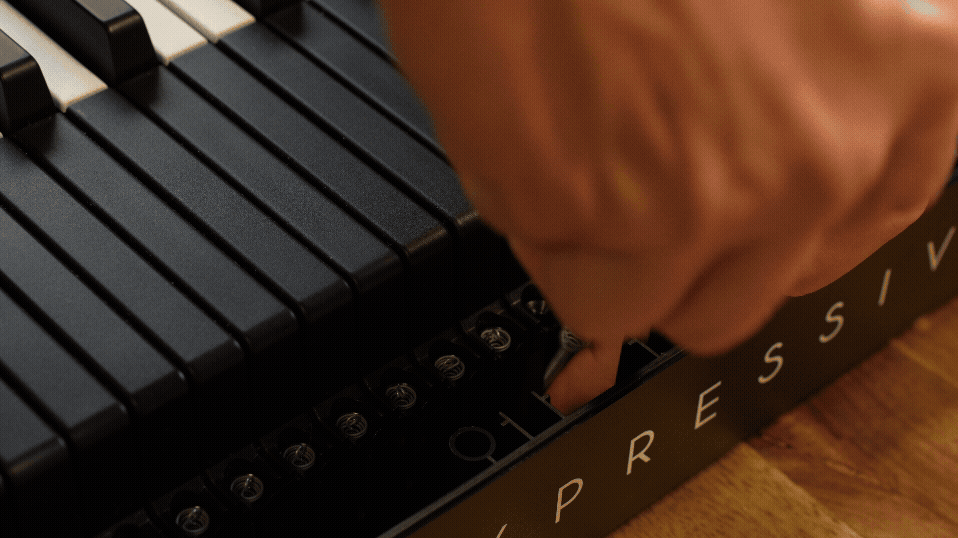
1. Remove the spring at the rear end of the key if it has not happened yet
If the spring has already detached, you should have found it tumbling inside the instrument after taking the top plate off. If it is still in place, use a narrow pair of pliers to detach the spring of the concerned key:

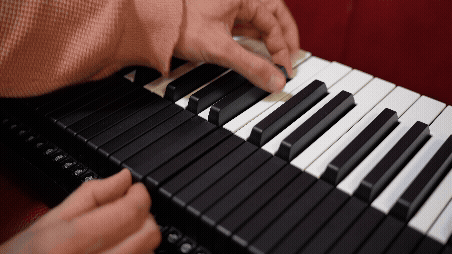
2. Detach the key completely
Once the spring is removed, the key can be easily removed. Assuming the key wasn't already lifted higher than the idle position anyway, to overcome the so-called "limit stoppers" when lifting the keys, white keys need to be pulled a bit towards the front of the instrument, and black keys need to be pushed a bit towards the back of the instrument.
3. Understand how the keys sit on top of the silicone cylinders and are held by the limit stoppers
Have a look at the arrows in the picture below. You can click the picture to zoom in.
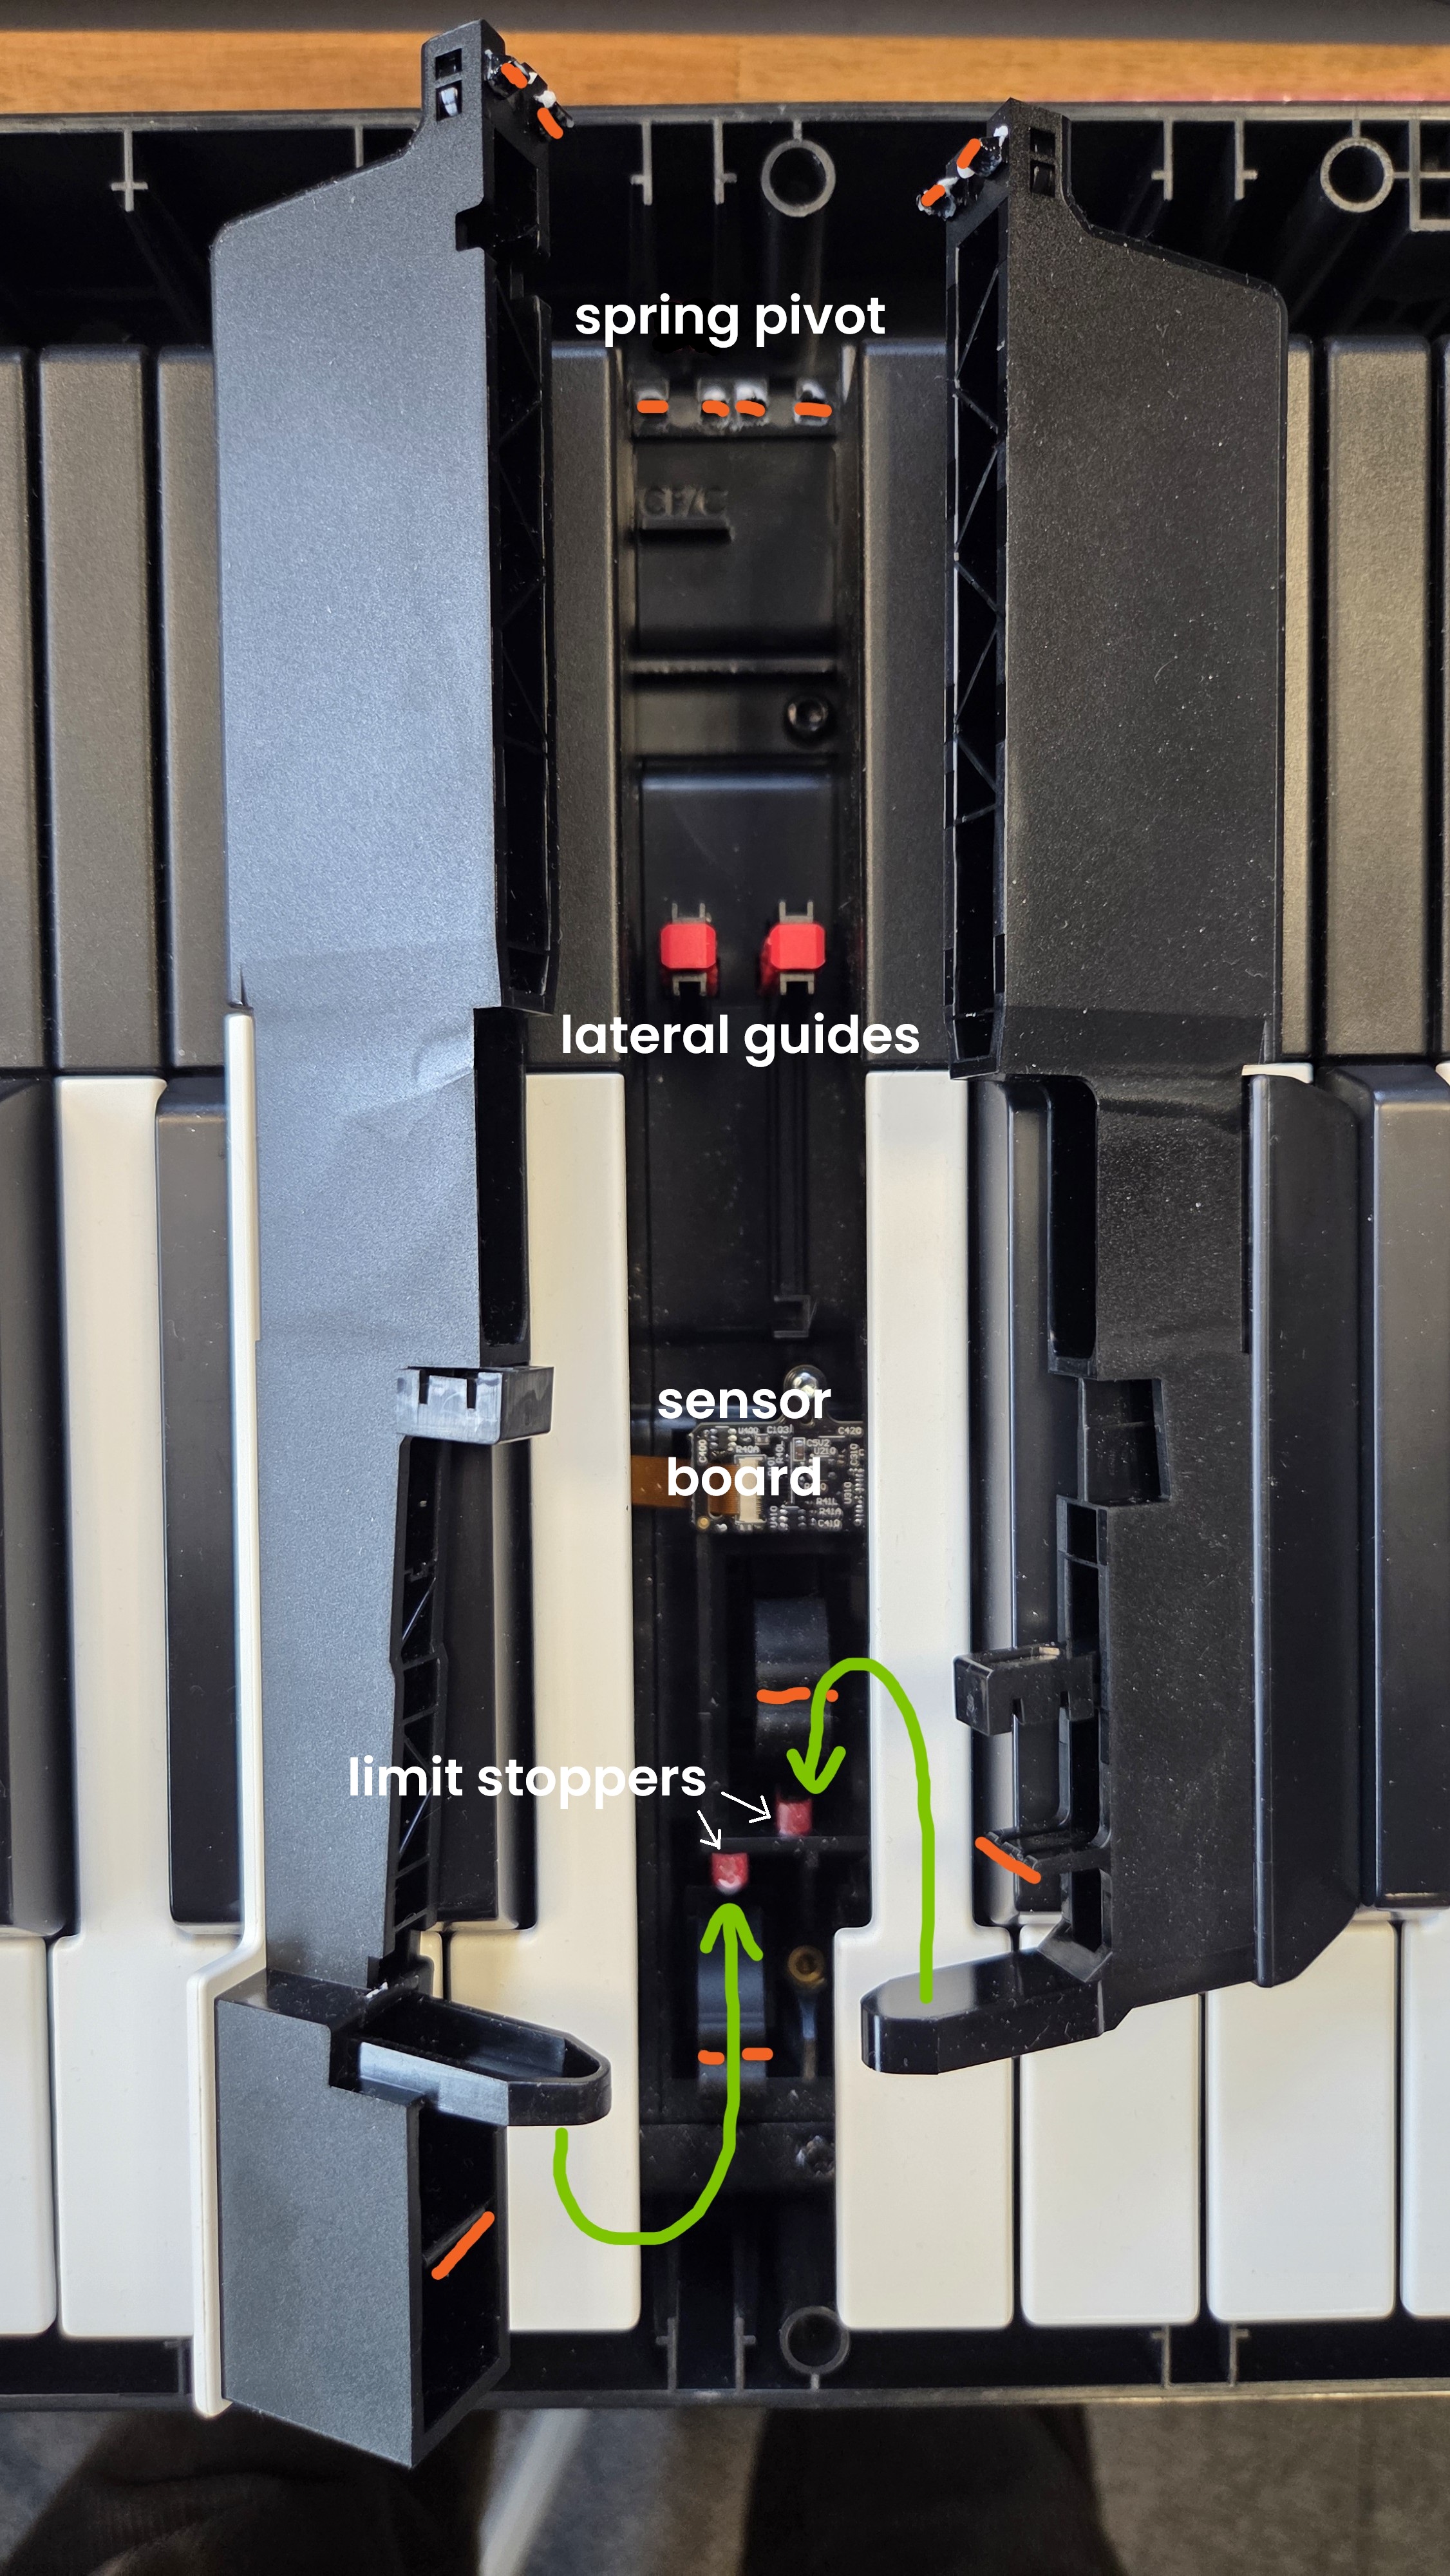
The limit stoppers prevent the keys from being lifted beyond their designed idle level during normal operation. The green arrows show how the noses, with their recesses, enclose the limit stopper when the key is in its idle position. For white keys, the key encloses the limit stopper from the front, and for black keys, from the back.
The points of contact with the keyframe at the rear and with the silicon cylinders at the front are marked with orange lines.
4. Reposition the keys properly
Put the keys back into their designated position. Insert them vertically without applying any force. For white keys, start slightly from the front of the instruments to enclose the limit stopper with the key nose. For black keys, start slightly from the back.
⚠️ Repositioning the keys while the springs are detached requires no force at all. While repositioning a loose key, avoid applying any pressure. Letting the key scrape intensively against the sensor board can damage or even unsolder the key sensors, making a product return inevitable.
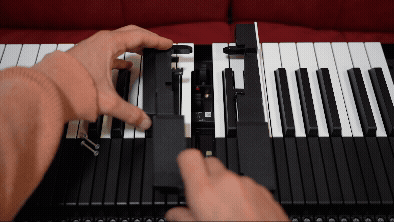
Once in place, give the key a quick press to see if it responds in roughly the same way as the other keys that are still in place, bearing in mind that the pivot at the back is not yet fixed. This is just to make sure the key sits on top of the silicone cylinder underneath.
5. Snap the spring back in place
Using pliers again, insert the lower part of the spring into its compartment, hold it in place with one finger, then pull the spring slightly to let it snap into its designated position, allowing it to serve as a pivot for the key again: